Characters of fairy tales, Russian folk crafts. DIY autumn crafts from natural materials for kindergarten. How to make a hero out of paper
Crafts on the theme “Fairy Tales”: With children we make panels and compositions from natural materials.

Crafts on the theme “Fairy Tales”
Today we continue with you our autumn children's crafts workshop. Together with you we have already made crafts based on children's fairy tales - detailed master classes in step by step photos With step by step descriptions You will find in the articles:
And today in this article there are more ideas for crafts on the theme “Fairy Tales” with children preschool age. They were sent to us on the “Native Path” by Lyubov Anatolyevna Petushkova - teacher middle group No. 11 “Stargazers” from Yugorsk Tyumen region(MBOU Secondary School No. 5). The group “Stargazers” held a family competition of crafts made from natural materials on the theme “Fairy Tales”. Here are some fairy tale-themed crafts that parents and their children created.
We will be glad if these ideas and photographs of the work of children and parents will help you make your own interesting crafts based on the plots different fairy tales with kids.
Crafts on the theme of fairy tales about Baba - Yaga
Baba Yaga in a mortar

Baba Yaga with a broom

Crafts on the theme of the fairy tale about Kolobok


Craft on the theme of the fairy tale “The Three Little Pigs”

Craft on a fairy tale theme: Masha and the Bear
This craft is made using the appliqué technique from natural material.

Crafts on the theme “Tales of the Goldfish”
Craft - gold fish- also made using appliqué technique. It's very easy to do. On a sheet of cardboard we draw a sketch of the future craft. Apply PVA glue to one of the details of the sketch and fill the outline with natural material. Next, fill in other details until you get a picture.
You can lay out the entire image only from natural materials, or you can lay out only a part, adding details to the plot picture with details drawn with a felt-tip pen or paints, or an appliqué made from colored paper.


Craft: fairytale hut on chicken legs


Craft based on a fairy tale: Miracle tree

You can learn the technology of making crafts from natural materials for children from detailed step-by-step master classes in the section
All children love fairy tales. Sometimes the characters that kids want to play with are not on sale or parents don’t have enough money for toys. Therefore, homemade ones will come to the rescue; they are quite simple to create, especially if a child helps you. The most valuable thing when making toys with your baby is the development of his abilities and imagination. Any material can be useful: plasticine, cones, fabric and paper.
Dragon
Can turn out colorful and bright fairy-tale heroes. Even schoolchildren make them with their own hands, without the help of elders, using plasticine. This is the most convenient material for children's modeling. You can try to sculpt the Serpent Gorynych from a fairy tale, and at the same time give him a kind smile and a gentle character. You will need to roll a lot of plasticine balls Green colour: from one we will make the body, three will go to the heads, four to the paws. Each of them must be slightly stretched and rolled into sausages. Now all that remains is to attach all the elements to the back. But that’s not all: we create wings from two balls, attach eyes to the heads, mark the nostrils with a match, cut out the mouth and put the tongue in place scarlet color. The snake will turn out to be very kind. And rightly so: there is enough evil in the world.
Kolobok
Crafts from fairy-tale heroes come in different forms. For example, these could be characters from Russian folk tales and full-length films.
It is recommended to make toys using simple, easy methods together with children. younger age, and with those who are older, you can try more complex technologies. Whatever hero you have to make, the main thing is that he is kind. For example, a smiling and funny kolobok from a Russian folk tale can be made from ordinary threads. To do this you need to take balloon, glue, threads and colored paper.
We inflate the ball, and the color does not matter. The jar of glue should be pierced with a needle; a needle and thread will pass through this hole, lubricated with sticky mass on all sides. Then we wind the thread around the ball: everyone chooses the density themselves. After there are quite a lot of threads, the workpiece needs to be dried. When the process is complete, the ball must be pierced.

Then you need to pull it through the hole between the threads. The ball can still serve and please the baby if you do not pierce it, but simply carefully untie it and let the air out of it. All that remains is to glue on the eyes, mouth and cheeks, which are cut out of colored paper. You can add a hat. That's it: the mischievous and funny bun is ready.
Cheburashka
How to make fairy-tale heroes with your own hands? Now we'll tell you. For example, we propose to make the cute and beloved character of E. Uspensky, Cheburashka. To create it, the following materials will be useful: cardboard (only necessarily corrugated) in two colors corresponding to the natural shades of Cheburashka: yellow and brown. You will need several types of glue: PVA and hot.

The body and head of the toy are made in the same way. For them you will need four parts: two front and the same number of back. The front sides are made first. They are rolled out of cardboard yellow color. Add two rows of brown cardboard on top. To add volume, slightly squeeze out the middle of the parts and fix them with glue. This will be the face and tummy of Cheburashka. The back parts of the head and torso are performed in brown color. They need to be glued together. The legs, arms and ears are made in the same way. Using cut out individual parts, a characteristic face with eyes, nose and mouth is created.
Pinocchio
It's rare to find toys made of wood in any home. Only real craftsmen create beautiful and original wooden fairy-tale characters. It’s difficult to make them with your own hands, but quite possible. If, before working on a character, you read a fairy tale about the wonderful boy Pinocchio with your children, they will be very happy to help in finishing some of the details.

For beginning craftsmen, the softest types of wood are suitable. These include aspen and linden. The toy's head, body, arms and legs are made from solid elements. All small parts can be made from leftovers. Then they need to be sanded using Fasteners for wooden Pinocchio parts can be of two types: wire and hinged. The first connection will be effective for small toys. If you are planning a volumetric one, you will have to work hard on connecting its parts. Her nose, eyes, hair, expressive hands and bright clothes will bring life to life. This Pinocchio, made and assembled with your own hands, will become a favorite toy not only for children, but also for grandchildren. This toy will be unique and will be passed on to future generations.
There is no need to specifically look for soft toy lovers. Even adults still buy furry fairy-tale characters for themselves, just like they do for their kids. Soft toys are sewn during school clubs. For children involved in such creativity, ready-made kits are sold.
Origami
But the simplest material from which you can make crafts for fairy-tale characters is, of course, paper. Original patterns For the entire fairy tale, you can come up with it yourself or find ready-made ones. In any case, there is an opportunity to show creativity and imagination by coloring the elements and details in your own way. In this way you can make Karabas-Barabas, Pierrot and Malvina. And then act out a whole play with friends. It will work out puppet show Houses. If you want to continue demonstrating your talents, you can consider various ways, how to make Cinderella, Snow White, Jasmine and others magical characters. Fairytale princesses can be created from ordinary colored cardboard. To do this, we roll one colored sheet, blue or pink, into the shape of a cone - this will be our dress. From another part of the cardboard we cut out the torso and head, attach them to the skirt. Then we draw the face. Glue threads instead of hair. As a result, we will get a gentle Cinderella or a beautiful Rapunzel.
Quick navigation through the article
Has your kindergarten or school announced an exhibition of winter-themed crafts? Or do you just want to keep your little one busy with creativity on these cold days? In one material, we have collected for you 6 ideas for winter crafts from natural and scrap materials with step-by-step master classes, a selection of 60 photos and videos.
Idea 1. Tabletop diorama with a winter theme
A tabletop diorama will allow you and your baby to show off all your talents - from modeling to design. Moreover, using a variety of materials and objects: branches, cones, toys (for example, from Kinder Surprise eggs), plasticine, salt dough, cardboard, cotton wool and much more.
First of all, you need to come up with a plot for your diorama and plan the composition. You can recreate any of your fantasies or be inspired by our selection of topics with photos and small tips on making crafts.
Topic 1. “Winter in the forest”

The craft is made of polystyrene foam and plasticine. You can also make a bear from polymer clay or salt dough

If in kindergarten or school you were given an assignment to do winter craft made from natural materials, then you can use cones. They make excellent Christmas trees, owls, deer, squirrels and hedgehogs for the winter forest. By the way, we just have several master classes on how to make them.

Want to make a simple craft more effective? Just light it up with an LED garland! To embed light bulbs in cardboard, you need to make cross-shaped cuts in it.

This winter forest Made entirely of felt. Animal figurines can be placed on fingers

Topic 2. “Winter House”
A favorite theme at winter craft exhibitions. The house can be surrounded by a forest or a courtyard with paths, a gate, a rowan tree, a skating rink and a snowman. And the hut itself can be beautiful not only outside, but also inside.

This video tutorial shows a simple and quick way making winter crafts from natural materials, namely twigs and pine cones.
Topic 3. “Christmas in a village/town”
If you build a couple of houses and connect them with beautiful streets, you will have a whole village or town.

The easiest way to make houses is from paper, or rather from printed templates that you just need to cut out, paint and glue. The next video presents step-by-step master class for making such a craft.
Topic 4. “The North Pole and its inhabitants”
Want to make a more original craft? We suggest making a diorama on the theme of the North Pole.

To make such a craft, download and print the templates (click on the picture to download), transfer them to cardboard, then cut, connect and paint the parts


Topic 5. “Winter fun”
Craft on the theme winter fun illustrates all the joys of winter. For example, sledding, making snowmen or playing snowballs. Lego men (pictured below), Kinder Surprise egg figurines and any small toys are well suited for recreating winter scenes. You can also make little people with your own hands from plasticine or polymer clay.

Topic 6. Winter sports
Another very original idea crafts - a diorama on the theme of skiing, figure skating, hockey, bobsleigh, snowboarding. By the way, the Olympics in Sochi can serve as inspiration and a model for modeling.


To make these ski figures, download, print, color and cut out the templates (click on the picture to download the templates), then glue a toothpick to the hands of the men, and a popsicle stick to the legs.


Topic 7. Scenes from fairy tales
Choose your favorite fairy tale story and recreate one of its episodes. For example, this could be the fairy tale “12 months”, “ The Snow Queen", "Morozko", "The Nutcracker", "At the behest of the pike."

Everything in this craft on the theme of the fairy tale “Po pike command» molded from plasticine and only the mill is assembled from matches

To make such a craft, you need to cut several holes in a piece of plywood and insert tree branches into them

This composition is dedicated to the theme of the ballet “The Nutcracker”. The figures in it are made of... clothespins. Unfortunately, clothespins with a round top are not sold in Russia, but you can order them on the Aliexpress website or use regular ones
From this video you will learn how to make a winter craft with your own hands based on the fairy tale “At the Order of the Pike.”
Idea 2. Skating rink with a controlled figure
The originality of this winter craft is that the skater can be smoothly “rolled on the ice” by moving a magnet along the back of the box.

What you need:
- A shallow tin can for cookies, tea, etc.
- Paper;
- Paints and brushes, pencils or markers;
- Paperclip or coin;
- Glue;
- Magnet.
How to do it:
Step 1. Decorate the tin box so that it resembles an ice skating rink: paint the bottom with blue and white paint and cover with clear varnish (glitter nail polish works well), you can place garlands and flags on top of the box, and snow-covered trees on the sides.
Step 2. Draw a figure of a girl or boy skating on thick paper or cardboard, then cut it out and glue it to a coin or paperclip.
Step 3. Attach a magnet to the back of the box. Voila, the skating rink is ready!
Idea 3. Painting made with prints
Drawing pictures with fingerprints, handprints, and even toes is a lot of fun, especially for preschoolers. All you need is imagination, gouache and a sheet of paper! In the following selection of photos you can see examples of such drawings.


Idea 4. Mini Christmas tree made of paper
Another winter craft idea for little ones is paper Christmas trees. They are made very easily and quickly, and you can use them in any way: as decoration for the same diorama, applique for New Year's cards or a panel to decorate a garland or Christmas tree.

What you need:
- A sheet of green paper and some brown paper for the trunk;
- Glue stick;
- Scissors;
- Sequins, rhinestones, beads and other decorations for the Christmas tree.
Step 1. Make a square from a sheet of green paper by folding one corner of the sheet as shown in the photo and cutting out the excess.

Step 2. Cut one of the short sides of the triangle into equal narrow strips, not reaching the fold about 1 cm (see photo above).
Step 3. Now straighten your workpiece and begin gluing the ends of the strips to the center fold line one by one, moving from bottom to top.


Step 4. Once you have secured all the stripes, fold and glue the bottom corner of the tree to the top. Further in the same place, but with reverse side, glue a small rectangle (tree trunk) cut out of brown paper.


Step 5. Decorate the tree with colorful beads, sparkles, buttons and other decor. If you wish, you can make several of these trees, glue loops to them, and then assemble a garland or decorate a real tree with crafts.
Idea 5. Snow globe... or rather a jar
Now we propose to make a real souvenir with your own hands - a variation of a snow globe. True, it will be made from an ordinary glass jar. The child can give the craft to a loved one, present it at a winter crafts competition, or simply leave it on the shelf for beauty.

What you need:
- Glass jar with lid;
- A piece of foam;
- Glue (hot or “Moment”);
- Acrylic paint for decorating the lid (optional);
- Artificial snow or just sea salt, sugar, finely grated white soap or polyethylene foam;
- Figurines that will be placed in a jar;
- Foam balls or any white beads;
- Fishing line;
- Needle.
How to do it:
Step 1: Repaint the lid the desired color and leave to dry. In this project, spray paint was used to remake the lid.
Step 2. While the paint is drying, let's make a “snowfall”. To do this, you need to string several foam balls onto a fishing line threaded into a needle. Use tape to attach the snowflakes to the jar.
Step 3. Trace the bottom of the jar directly onto the foam, then use a knife to cut the resulting circle out of it. This circle will become the basis for the figures.

Step 4. Glue your figures to the foam circle, then glue the resulting composition to the bottom of the jar.
Step 5. Pour artificial or homemade snow into the jar, close it with a lid with snowflakes and enjoy the view of a winter fairy tale.

Idea 6. New Year card
There are never enough New Year cards, so we suggest making a few together with your child.

What you need:
- A sheet of white paper;
- A sheet of colored paper;
- Scissors;
- Glue stick;
- Markers.
How to do it:
Step 1. Fold a sheet of white accordion paper three times so that each top accordion layer is smaller in width than the previous one.
Step 2. Straighten your accordion, cut the sheet diagonally and slightly in waves as shown in the photo above, then assemble the accordion again. You have the slope of a snow-covered mountain.
Step 3. Now take a sheet of colored paper, glue the blank onto it and cut off the excess. Hooray! The postcard is almost ready.

Step 4. Decorate the mountain with Christmas trees, draw snowmen and skiers and finally sign the card.


Using the same principle, but using larger paper, you can make a winter craft in kindergarten.


Our mothers and grandmothers constantly make crafts for kindergarten-aged children. What these crafts are not connected with: and with calendar holidays, and with the anniversaries of the organization, and with the events of the year. It’s impossible to list everything.
Fairy-tale heroes
One of the favorite topics is “Do-it-yourself fairy-tale heroes.” Why is this relevant? As easy as pie. Russians are constantly read to preschool children folk tales. Reading occurs not only because it is understandable and close to children, but also because it is easier to educate through a fairy tale than to mutter edifyingly about what is possible, what is good, what is correct. Through a fairy tale, you can unobtrusively and easily make it so that the child does not notice that he is being called to something, is being taught something. He easily gets involved in the process and happily participates in it.
Now imagine that the fairy tale is also accompanied by real heroes. This is simply fantastic: a preschool child develops according to imaginative thinking. It is important for him to see a hero, an action, an image. He does not have developed logical, much less abstract, thinking. But if, along with telling a fairy tale, you offer a hero from this work, then the matter will advance to unattainable heights, and you will simply become the child’s idol.

Fairy-tale characters make it easier to enter into the proposed events. And fairy-tale characters created with your own hands become even more familiar, understandable, and, most importantly, more valuable (after all, “your shirt is closer to your body”).
Let's try to make our own heroes
DIY crafts of fairy-tale characters can be found in literature or from friends. The main thing is not to “drown” in the variety of forms, techniques, and ideas of this direction. Here's what you can use:
- Paper. Available material, cheap, anyone can handle the cutting technology.
- Dough, clay. Don't think this is material for kindergarten age children. There is a place for older people to roam here too.
- Threads, knitting. What the masters of this type of art can’t come up with! You will simply be surprised at what you can knit with threads.
- Tree. How much you can make from this wonderful material! Don't think that Pinocchio is the only wooden character.
- Textile. What not to sew from this very versatile material! People, animals, even just objects, furniture, Natural resources- easily.
- Plastic.
What is there to list? You can take any material that is closer to you, clearer, easier to process and more affordable.

How to make a hero out of paper
Making a fairy-tale hero from paper with your own hands is easy. You understand perfectly well what you will use in your work, especially since you can always choose the simplest, cheapest materials. First of all, we choose a character: Baba Yaga, princess, bunny - whoever. We take scissors, a template (if imagination is tight), and cut out a shape using the template. The hero character is ready to stage a fairy tale.
It can be more complicated. The modular origami technique will require a lot of time and money. Here you will need to add up several tens or hundreds of triangle modules to volumetric figure. But it’s okay, it’s a bad start. The main thing is the ability to connect modules in a circle, and then, where necessary, subtract or add elements in a row. This way you can make figures of a hare, fox, wolf, even an old man and woman.
The quilling technique will require more virtuosity from you. It is very labor-intensive: curls, droplets, “eyes”, plant elements will require you to spend a long time creating beauty. But the work will turn out to be very gentle, elegant, noble.

Most often, parents find it difficult to find time to spend with their children. Then, to make a fairy-tale toy with your own hands for kindergarten (for example), you can fold the paper in half and create a princess, a bunny, or a tree using symmetrical cutting. The baby will have a lot of delight, and you will spend a minimum of resources. Moreover, creating the figures will take a few minutes, which corresponds to the age of a preschooler for concentration and interest in the process. A do-it-yourself fairy-tale hero for kindergarten is interesting, simple and useful.
Let's try to make heroes from dough?
Try it, this process is also very addictive. After all, you can sculpt anything from salt dough. Don't think that you can only make some trinket. In fact, even masterpiece heroes and compositions with very small details and exclusivity of patterns. Again, fairy-tale characters can turn out to be very original and unique. Using one pattern, different craftswomen will recreate completely different things. The same needlewoman does not repeat herself in her works. We don’t think we need to convince you of this. The main thing is to start.

Fairy tale in metal
Do you think it's impossible? Are there not enough excellent blacksmiths in Rus'? What about a flea? An almost reliable fact is how Lefty shoed a flea. True, it is a painstaking task. You can't get by with the small details here. We need scope. This is not suitable for a child of kindergarten age. But it’s worth trying to create a New Year’s fairy-tale hero with your own hands. By the way, the sculpture can also be embodied in ice material. Yes, you yourself saw fairy-tale characters in the squares (especially Father Frost and the Snow Maiden, three horses with a sleigh).
Here, of course, it’s difficult to get by with nail scissors; you need a saw and tools for working with ice. But that doesn't matter either. Your desire to create, to create in front of your child’s eyes, noticing his interest, surprise, and desire to help you, is very important. And when the result is already in reality, there is also an assessment of the child’s help in the work. This is truly worth a lot.
What about the fabric?
Is it possible to create fairy-tale characters with your own hands from fabric? There are no limits to human perfection. Fairy-tale characters can be embodied through the pattern of any living or inanimate object. By the way, how many New Year's costumes of fairy-tale characters you can make from fabric with your own hands! You just have to move forward without stopping there.

Can threads work too?
Oddly enough, yes. Indeed, even text messages with important data were written from threads (previously it could have been knotted weaving). Why not connect Piglet with Winnie the Pooh and the dog Sonya now?
What heroes can you make?
Absolutely any. The only limit is your imagination. Here are the characters you can make with your own hands:
- Kolobok. The simplest and one of the first characters. This hero can be made from paper (flat, origami, modules) and from threads (knitted, stuffed with synthetic padding; or you can wind threads around a ball to get an openwork Kolobok). You can fashion a hero out of dough, decorating him with some kind of Panama hat.
- Princess Frog. A simple way to make a frog from plasticine. A very profitable option, because imagination can not only tell us that we need to add an arrow and a crown, but also fashion beads. And it will be even more expressive if you dress this “lady” in a royal dress.
- Goby - tar barrel. Homemade wooden toys are rarely found in the house. But such a character is easy to make, even just by taking a cut from a tree. Glue the head, legs to the body, fluff out a tail from threads.
- Baba Yaga. A very common fairy tale character. This image can be sewn from various old scraps. But the face will have to be worked on. It is worth doing it using the stocking sewing technique. To do this, you will need fabric very similar to nylon tights, although you can take the tights themselves. When you fill the hero’s “face” with padding polyester, you can sew on the eyes using large beads or buttons. Embroider the mouth with red threads, and wrap the nose (you need to separate a small part from the middle of the face) with threads matching the color of the fabric.
In short, the choice of hero, material and technique is entirely at your discretion.

Finally
Playing with a child is simply necessary, because this is the only little man a way of understanding the world and oneself in it. Socialization occurs from the very beginning early childhood, and the first with whom the child associates himself are, among other things, fairy tale characters. From their example, the child learns how to act well and how to act badly, and receives the first knowledge about nature, rules of behavior, phenomena and objects. What will help better than hand-made toys and fairy-tale characters? Moreover, this has a double benefit. You will spend time with your child while you make the Snow Maiden or a bunny from a fairy tale, and he will develop Creative skills, fine motor skills, perseverance.
“We always expected cheerful magic from him. If you’re with him, it’s so enticing – you won’t be able to tear yourself away.”
Lydia Chukovskaya (about her father Chukovsky Korney Ivanovich)
If you didn’t go anywhere in the summer and stayed in Moscow, then it’s time to go with your children on a wonderful excursion to the Chukovsky House Museum, reread with your child your favorite fairy tales that Korney Ivanovich wrote, or read new ones that your child does not yet know.
The name of Korney Ivanovich is known not only in Russia, but far beyond its borders. Many of his books have been translated into various languages peace. There are very interesting fact in the biography of the writer: in 1962, the University of Oxford awarded the writer academic degree, title - Doctor of Literature. Another equally interesting fact: the real name and surname of the writer is Nikolai Vasilievich Korneychukov. Chukovsky Korney Ivanovich is a writer's pseudonym. And it is by this name that all the children know him.
Excursion to the House-Museum of Korney Ivanovich Chukovsky
The Korney Ivanovich Chukovsky Museum is located very close to Moscow, in the town of writers, in Peredelkino near Moscow. You can also get there public transport, and in your car. In a picturesque town, surrounded by pine and birch trees, there is a house-museum of a beloved children's writer.


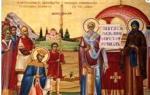
Before entering the museum grounds, take a look at the brickwork-fence with your children, which is located opposite the museum gate, across the road. There are plot pictures based on the fairy tales of Korney Ivanovich Chukovsky. True, it is clear from everything that they were painted a long time ago and, apparently, also have not been updated for a long time: the paint is cracked in some places, faded and peeling. But it is quite possible to consider episodes from fairy tales. This is some preparation for the excursion. Because, without even entering the museum, already here, at the gate, you can plunge into the writer’s work and play the game with your children: “Guess what the artist drew?” The children will vying with each other to recite poems from the works of Korney Ivanovich to you by heart. Ask what word Aibolit repeated when he was hurrying to Africa. Who put out the sea in the fairy tale “Confusion”? What is the favorite delicacy of crocodiles from the fairy tale “Telephone”? What did the Cluttering Fly treat the butterfly? Amazing! Everyone is ready for the excursion!
Let's go! Immediately, there is a large tree in the yard, on which “shoes, sandals and boots have already grown.” Don’t forget to tell the children before the excursion that Korney Ivanovich has a wonderful, funny, very positive poem “The Miracle Tree”. You can read lines from the poem at the improvised miracle tree, which is located in the courtyard of the house-museum:
Like ours at the gate
The miracle tree is growing.
Miracle, miracle, miracle, miracle
Wonderful!
Not the leaves on it,
Not flowers on it,
And stockings and shoes,
Like apples!
The miracle tree is a “magic tree” on which, instead of fruit, sandals and shoes grow, which can be seen right near the writer’s house!

The poem was written by Chukovsky in 1926 for his daughter Murochka.
And if you are lucky and your excursion is led by Uncle Volodya, then the children will certainly remember it long years. The guide is simply wonderful!

Before the excursion, you read fairy tales, got acquainted with Chukovsky’s new works, but what to do after the excursion?
Of course, enjoy the memories, make interesting crafts, learn by heart excerpts from your favorite works and, of course, spend time based on the works of a children's writer.
Crafts based on the works of Korney Ivanovich Chukovsky
Craft “Miracle Tree”

An original craft is made from an ordinary paper bag.
What do you need?
- Paper bag,
- scissors,
- threads,
- paper,
- pencils.
How to do?
Cut the paper bag from the top into strips to the middle. Then you need to twist it in such a way as if you were squeezing out laundry.

Branches are made from straightened and twisted strips. The tree is ready! It is very stable.
Now you need to print out pictures of shoes on a printer or draw boots, shoes, sandals, shoes yourself. Color it and hang it on the branches with a string. The miracle tree is ready! It can serve as a decoration for a child’s room!
The second version of the “Miracle Tree” is made from paper cylinders

What do you need?
- One paper cylinder (you can make it yourself from thick paper or take a ready-made one from toilet paper),
- colored paper,
- shoes drawn or printed on a printer,
- scissors,
- glue.
How to do?
Make a tree crown out of colored paper and glue shoes to it (or better yet, draw and color). Glue the crown to the cylinder. The miracle tree is ready in 5-10 minutes!
Everything is very simple, fast and beautiful! After the beautiful craft is made, you can play!
Play the game " Fairytale names. Who is this?". Prepare pictures that depict Aibolit, Fedora, the shark, Barmaley and other characters from the works of Korney Ivanovich Chukovsky.
You ask the question: “Who is Aibolit?” The child looks for a card with a picture of Aibolit, points to it and says: “Doctor.”
"Barmaley?" - “Robber.”
“Fedora?” - "Grandmother".
“Patter?” - "Fly".
Craft-toy “Crocodile, Crocodile, Crocodilovich”

In which of Chukovsky's fairy tales is the crocodile the hero? “Crocodile”, “Cockroach”, “Stolen Sun”, “Confusion”, “Barmaley”, “Moidodyr”, “Telephone”.
They say that before becoming a children's writer, Chukovsky did a lot of translations, wrote articles, literary critic. One day he got sick little son. At this time they were traveling on the train. The boy was capricious and crying. Then Korney Ivanovich began to tell him a fairy tale. “Once upon a time there was a crocodile, he walked the streets.” The boy calmed down, and the next day he asked his father to tell him the same fairy tale again...
This is how the fairy tale “Crocodile” appeared, with its main character - Krokodilovich!
Once upon a time there lived a Crocodile.
He walked the streets
Spoke in Turkish -
Crocodile, Crocodile, Crocodilovich!
Shall we make Krokodilovich, who was defeated by Vanya Vasilchikov?
What do you need?
- A picture or drawing of a crocodile,
- scissors,
- glue,
- 2 wooden skewers or juice straws.
How to do it?
Draw or print a picture of a crocodile. Color with your child with bright colors.
Let your Krokodilovich be cheerful, kind and perky! Cut it along the outline. Cut the picture into 2 parts. Next, you need to bend a colored sheet of paper like an accordion and glue two wooden sticks (skewers or juice tubes) onto it. It turned out to be an accordion.


For an accordion, you need to take thick paper so that it retains its shape well and stretches easily. Now you need to glue the accordion to the halves of the crocodile picture. What a fun toy it turned out to be!
Now I want to run and have fun!
Play outdoor game"Crocodile and turtles." The leading crocodile is selected. The rest are turtles. The turtles slowly walk around the crocodile's house and say a teaser:
— The Nile flowed among the sands,
The crocodile buried itself in the mud.
We are not afraid of the crocodile:
He's very cute today!
Hearing the words “very nice,” the crocodile runs out of his house and tries to catch up and grease the fleeing turtles. Whoever the crocodile catches becomes a crocodile and the game repeats again.
To play catch-up, you can learn a rhyme.
- Somehow a little crocodile
He swam away from his parents.
He went on a spree and got lost
And I was confused with fear!
We will help, so be it,
Come out - you'll drive!
Craft “The boss of wash basins and the commander of washcloths!”
Many, many decades ago, almost every family had washbasins. If not in the house, then at the dacha. Nowadays, the word washbasin, in general, has fallen out of use; it is practically not used in speech. And our children can learn about the washbasin from Korney Ivanovich Chukovsky’s fairy tale “Moidodyr”.
After reading the fairy tale, make a very easy, unusual and beautiful craft from the fairy tale. Your baby will be happy!

What do you need?
- 2 carton boxes,
- colored paper with adhesive backing,
- scissors,
- glue and a little imagination.
How to do it?
Finding two cardboard boxes at home is not at all difficult. To make this craft, you need to cover the boxes with colored paper or simply paint them with gouache. This will be the washbasin body.
Glue two toilet paper cylinders to the body. Decorate to your taste. Glue or draw eyes on the washbasin, make a faucet out of a juice straw, and make a sink out of a yogurt cup.
Add details: hair, hat. Hands - a towel made of a strip of paper.

We have a wonderful head of wash basins! And, of course, your baby will now know why we so often say: “...always and everywhere, eternal glory to water!”
You worked, glued, cut, painted. To rest your fingers, play the finger massage game “Shower”:
More blue cloud (clench and unclench your fists)
Water your hands with water (rub your hands)
Shoulders and elbows, (rub shoulders and elbows)
Fingers and nails, (rub fingers and nails)
And the back of the head and temples, (rub the back of the head and temples)
Chin and cheeks, (rub chin and cheeks)
Three washcloths on the knees, (rub the knees)
Rub the brush well (rub your knees)
Let's rub the girl/boy well, (name). (rub the whole body)
Korney Ivanovich's poems and fairy tales bring children a lot of joy. Today we simply cannot imagine childhood without his fairy tales: without “Aibolit” and “Tsokotukha the Fly,” “Confusion” and “Telephone,” “Moidodyr” and “Fedora’s Grief.” Although, today Korney Ivanovich Chukovsky is considered a controversial children's writer. The attitude of adults towards his work is ambiguous. Children like his heroes, his poems, and adults see in his works either cruelty (“I’ll chop you up like beef. I, glutton, have nothing to feel sorry for you”), or violence (“And at full gallop he cuts off his head”). And the children just laugh merrily. Because they perceive “adult cruelty and violence” as the victory of good over evil - what all fairy tales teach children.
I remember when I first read the fairy tale “Barmaley” to my little son, it made a huge impression on him. He asked to read it every day, and we read it, sometimes 2 times a day. He really, really liked her. When he grew up, he knew it by heart!