The best tutorial on painting with watercolors. A tutorial on watercolor painting. When the sun was a blot
Watercolor paints are one of the most loved by artists. Firstly, watercolor has a lot of different techniques, and secondly, with its help you can create a beautiful drawing, even if you don’t know how to draw at all.
These techniques will help beginners learn how to draw, and professionals will refresh their memory and find inspiration and ideas.
1. Painting with a flat brush
Step 1
Draw a square or rectangle to mark the start and end of the layer.
Select a darker shade (it's easier to see) and starting in the top left corner, touch your brush to the paper and gently draw a straight line all the way to the top right corner.
But: Left-handers should draw from the right corner to the left.
Step 2

Fill your brush with paint again.
Start the next stroke from the bottom edge of the first, trying to cover the accumulation of paint that has formed at the bottom of the first stroke.
Hint 1: If the buildup of paint in the first stroke does not flow completely into the second, then increase the angle of your easel to help the paint flow freely.
Hint 2: By increasing the angle of inclination, you also increase the chances of getting uncontrollable paint flows. So try to work faster or have something like a rag or sponge on hand to quickly clean up spills.
Step 3

Repeat the previous step, also trying to cover the accumulation of paint in the top stroke.
Hint 3: You can use the flat edge of the brush to “cut” the beginning of the layer and make it even.
Hint 4: If you want to smooth out the end edge of a layer, then at the end of the stroke, pause and move the brush up and then down as you would with the beginning edge.
Hint 5: If the stroke turns out to be intermittent, then immediately fill the brush with paint and re-stroke it.
Step 4

Repeat the previous steps until the very end. Try to stick to the same paint tone.
Hint 6: You won't believe how different the behavior of brushes, paints and paper can be between different brands. Typically, more expensive and popular brands make your job easier by providing high quality products.
Hint 7: If your strokes are choppy even when your brush is full of paint, you are using paper that is too thick or the paper is too rough in texture. If you come across such paper, spray it with water, blot it with a clean sponge and let it dry. This will make the surface more receptive to your paint.
Step 5

Rinse the brush and squeeze out all remaining water from it. Gently pick up any clumps of paint left at the bottom of the final stroke with your brush, but don't pick up too much paint or you will discolor your drawing.
To create more texture in your design, let it dry at an angle. This will give the paint a more interesting look.
Gradient
Step 1

Draw a square or rectangle. Then dip your brush into a darker shade of paint (mix on your palette) and carefully brush over the stroke.
Step 2

Dry your brush with a sponge or paper towel and dip it again in a lighter shade.
Then draw a new stroke, overlapping the bottom of the previous one. Notice that the left side of the layer has already merged with the previous stroke. Let gravity do its thing.
Step 3

Rinse the brush again and dry it. And then refill the brush with paint and make another stroke. Repeat this process until the very end.
Hint 1: If your stroke breaks or doesn't go on as smoothly as you'd like, quickly refill your brush with paint and repeat the coat.


Step 4
Rinse the brush with clean water, dry it and pick up any remaining paint.
Hint 2: Try this technique by working with different colors and creating interesting transitions.

Watercolor glaze
Step 1

This technique requires improvisation and imagination. Using the example, we will draw an improvised landscape.
First we paint the sky and river with blue paint. We will separate the paint with a small amount of water, this will be a waterfall.
Step 2

Draw the clouds in dark pink and start drawing the mountain in yellow. We will also mark the bottom part of the picture in yellow.
The example uses light and transparent tones so you can see how the layers interact.
Step 3

By mixing cobalt blue and ultramarine blue, we will paint the horizon of the mountain and shade the small yellow slope.
Hint 1: allow each layer to dry. You can use a hair dryer to speed up this process. Keep it at least 25-30 cm away, turn on the cool setting and set the hair dryer to the lightest air flow. No steam or hot air!
Step 4

To shade and add interesting colors, we use orange. With its help we will create the shores in the foreground and shade the sky.
Hint 2: If you get droplets of excess paint, rinse and dry your brush as you did in the previous techniques, and pick up the droplets with it.
Step 5

Please note that the images show different paint brushes. You can use the ones you have on hand.
Take a dark blue color and use it to highlight the top of the mountain, varying the pressure on the brush and turning it to create an interesting texture.
Step 6

Using the same blue color, let's play with the waterfall by drawing some circles. Sometimes visual clichés become your friends.
Let's rinse the brush and pick up yellow, we will use it to add visual details to our shores.
Step 7

After the paint has dried, shade the bubbles in the waterfall with a shade of purple. This way we will make them more interesting.
Step 8

We need to link some elements and add trees. In the example, we used round templates for the crowns, but you can draw as you like.
Step 9

We will use brown color to depict tree trunks. We will also use blue to shade the water and sky a little more. Then, using pink, blue and green, we will paint the grass in the foreground.
Step 10

Use a mixture of pink and red to add the final details. Our trees are now bearing fruit, and several fruits lie under them.
If you look closely, you can see how each layer interacts with each other. A darker shade has more power, but when the colors overlap each other, they create an interesting and beautiful combination.
“Wet” technique
Step 1

Wet the paper with water
Step 2

Blot the paper with a clean sponge, removing excess water. Try to achieve an even distribution of moisture throughout the paper, you should get a satin effect.
If the paper is shiny, it means it is too wet, blot it again.
Step 3

We will draw the landscape again. Let's start, of course, from the sky. Using this technique, it is easier to draw the background first, then moving on to the foreground objects.
Step 4

We continue to draw the sky until we start to like it. The strokes will blur, creating an interesting effect.
Step 5

Now let's move on to the grass in the foreground. Using green, we will make several broad strokes, leaving space for the stones.
As the paper dries, the strokes blur less and less.
Step 6

Let's add forms. To do this, we use different shades of green and draw trees on the horizon.
Step 7

Having added the trees, let's try to add texture to them. To do this, use a darker shade of green to create accents.
Step 8

Add stones using gray color. We filled in the gaps in the foreground with this color, leaving some gaps.
Try to use either dark or cool shades. Using both dark and cool shades will create visual dissonance.
Step 9

Let's place accents to diversify the design. Using a crimson tint, we will depict several floral elements in the foreground. Let the crimson flow as it pleases. Then, using a dry brush, remove the color from the middle of the spots.
Step 10

Then drop clean water into the center of these spots to allow them to blend into the grass.
The hardest part about this technique is knowing when to stop. Overdoing it with blurs and colors will result in a messy drawing.
This technique gives a slightly strange but interesting result. A drawing made using this technique has a hypnotizing effect.
Dry brush painting
Step 1

We think the name of the technique speaks for itself. We will need to put paint on the brush, blot it from excess liquid with a paper towel or sponge, and then paint.
First, let's make a pencil sketch. After this, we roughly outline the sky by moving the brush over the surface of the paper.
Step 2

Let's paint the trees on the horizon line in green, outlining what will later become our lake.
Then, mixing purple and blue, we will draw the first layer of the tree trunk.
Step 3

Let the drawing dry and add some elements: the reflection of a tree in the lake and the flow of water.
Mixing green and blue, shade the shore in the background of the image and let the drawing dry again.
Step 4

Mix an intense blue with ultramarine and paint a layer on the tree trunk to create shadows and bark texture.
Step 5

Then, using shades of orange, we will depict an autumn landscape by painting over the background trees.
Step 6

Having finished with the previous step, use a light orange tint to depict the reflection of the trees in the water.
Also, mixing gray with blue, we will place dark accents on the trees.
We will also add trees on the other side of the horizon. Let's denote the tree shapes in orange.
Step 7

Let's take care of the water. Use dark green and brown to achieve the desired color. And with wave-like movements we will draw the water in the lake.
Step 8

When painting a lake, change the pressure on your brush to add texture.
Clue: if the brush is too wet, the paint will look flat. Dry the brush to intensify the colors.
Step 9

Let's add some grass under the tree, using the same color as for the grass in the background.
Step 10

Let's add some details to the foreground.
We will also darken the lake a little by adding a blue tint. We’ll also shade the sky with the same color.
Removing moisture
This technique will require several sponges. It is suitable for depicting clouds and soft light. It can also control the behavior of paints.

Sponges

Makeup sponges are best. They absorb well and give an interesting effect.
Try not to rub the sponge on the paper, and if you do, do it very carefully so as not to damage the paper.
Paper towels

With their help you can create sharper highlights. But paper towels absorb huge amounts of paint very quickly. Therefore, they can completely absorb fresh paint.
Paper towels can come in handy if you make a mistake. Then you can quickly remove the paint.
Dry brush

You can use a dry brush to create a design using this technique. To do this, rinse thoroughly and squeeze out the brush. With its help you can create clear lines.
Other methods:
- You can spray water where you want to remove the paint and then soak it up with a sponge.
- Use different fabrics to add texture
- You can use your fingers or other body parts. Skin can also absorb moisture.

Discoloration of dried paint
Watercolor brushes

Use clean water and a cloth, wet the desired areas, gently rub the drawing and remove the moisture with a dry brush. This method allows you to control the areas you lighten.
Brushes for oil or acrylic paint

Stiff bristles allow you to quickly scrape paint off the desired area. But it is worth noting that this method can damage the paper, so control yourself.
Here, just like in the first method, you first need to wet the area and then brush it on.
Spray and towel

Take a spray bottle and spray the desired area, and then apply a paper towel to it. This method leaves large light spots and gives an interesting effect.
Sandpaper

It is very rarely used, as it can damage the paper. It's best used at the end to add texture. You don't need water for this method, just rub the design where you want it.
Blades and knives

Can be used to highlight small areas and create crisp lines. This method is also very risky as it can damage the paper.
Sponges

You can also use sponges. Wet the desired area and dry it with a sponge.
Welcome to our watercolor corner. Let's remember together what a pleasure it is to paint with watercolors. This is a magical process and an amazing result if you stop being afraid and find a little time. You can create a beautiful drawing, even if you don’t know how to draw at all. You will see for yourself when you complete these few exercises that we have prepared especially for you from our best watercolor books.
1. The world of watercolor
A book about drawing without rules. You never thought that watercolor could be like this - free, vast, shining. Experiments, unusual effects, step-by-step demonstrations and practical recommendations await you.
No matter who we are, how old we are, or what experience we have, we can always learn new things.
Playing with watercolor spots
In this exercise, we'll apply bold shades of orange and purple side by side and see how they blend seamlessly in the center of the leaf. Try making color transitions where you can't tell where one shade begins and another ends. The merger should look harmonious. Scatter salt over the entire surface of the still damp sheet: fine salt on one side and coarse rock salt on the other. Let the work dry.
This technique is suitable for depicting roosters and animals with curly hair, such as poodles or sheep. Do you see silhouettes in your patterns?

2. How to understand watercolor

This is perhaps one of the most colorful and largest books we have. Almost 200 paintings by the best watercolorists under one cover! Their common denominator is respect for paint and confidence when working with it. In this tutorial, renowned artist and experienced teacher Tom Hoffmann reveals the secrets of watercolor painting and shares professional tricks.
You will learn to THINK like a watercolorist.
Why do you want to draw this?
Usually the artist paints not so much the subject of the image, but his understanding of this subject. Much of the pleasure of contemplating a painting's masterpieces lies in the fact that we - consciously or not - penetrate into the author's intention.
Understanding the reasons is the first thing you should do before starting work. Having chosen the subject of the image, ask yourself: “What is it about it that attracts me?” Before making decisions about how to write, I need to focus on why I want to do it. Think about it - and then what attracted you initially is guaranteed to become part of the finished work.

An artist who has learned to distinguish between what should and should not be depicted boldly embodies any of his ideas.
3. Artist's sketchbook

A sketchbook is a great place to bring any artist's ideas to life. This book is about improvisation. About that magic that turns objects and objects, emotions, impressions, smells and sounds into memories. Most of the drawings described in this book are done in watercolors.
Together with famous contemporary artists, you will go to paint in deserts and thickets, capitals and small towns. Try working alone, with a friend and in a group. See how to choose your subjects, simplify them, or work slowly and thoughtfully. Here is an example of a watercolor sketch.
Sketch of a favorite story
Start with a small sketch, then sketch out the outline of the sketch. In the next steps, add fill to the general plans. And then work on the details with a dry brush or gouache.

Such a watercolor sketch will evoke much more emotions than a simple photograph.
4. Portraits of fruits and vegetables

And those interested in botanical illustration will enjoy the book Portraits of Fruits and Vegetables by Billie Showell. Her book with stunning illustrations will enchant anyone and teach them how to draw delicious pictures on the fly. We are even a little afraid for the pages of this book: you will definitely want to taste some of them, the drawings are so realistic.
Drawing blueberries
Draw the outlines of the blueberries. Make a wash of cobalt blue. Moisten the berry with water. Apply paint to the top and left side. While the paint is drying, prepare a thick mixture of cadmium red dark, French ultramarine and a small amount of cadmium yellow light. Moisten the berry, wait for the water to be absorbed, then drop in the resulting mixture. Don't paint over the highlights. Apply paint. Use a clean, damp brush to soften the edges and make sure the paint doesn't drip onto the highlight.
While the paint is drying, use the tip of your brush to “tweak” the dark color where you want it, including the small ridges (dots) along the top edge of the berry. Prepare a rich mixture of indigo and cadmium red dark and apply paint to the berry with the tip of a brush. Using a dry brush technique, achieve the darkest tone possible. Give your drawing a more realistic look by using a damp brush tip to soften the edges. Sharpen the details.

5. Portraits of flowers from A to Z

Another book by Billie Showell will be a source of inspiration for both those new to botanical illustration and those who have already mastered the basics. The main part of the book is devoted to 40 master classes - portraits of flowers from A to Z. Each portrait is accompanied by step-by-step instructions and a list of mixed colors that were used in drawing. For beginning artists there is a detailed section about materials, technique and color.
Three brushes plus basic watercolor colors - and on your table are captivating thin stems, fragile buds, velvety leaves, and petals of heavenly beauty.

6. Watercolor inspiration

This unusual creative album with stickers will help you practice building a composition and choosing colors. It contains 60 beautiful watercolor paintings of nature in different seasons, created by four artists from around the world. At the end of the book there are sheets of stickers (as many as 500 pieces!) that will help you create your own picture. It's almost like painting, only with stickers.

Look at images of flowers, berries, butterflies, birds, trees and wait for the muse to visit! If you don't let go of your brushes and paints, you'll probably find ideas for your paintings in the album. You can practice right on the pages of the book: just complete the compositions with watercolors. Or take stickers and go ahead and create.
7. Botanical portraits

In his third book, Billy Showell talks about the materials, techniques and techniques he uses to create incredibly beautiful portraits of flowers, fruits and vegetables. Using images of flowers, greens, fruits and vegetables, Billy introduces the reader to his painting techniques that will inspire artists of any level. You will learn how to draw petals, jagged edges, velvety surfaces, fluffy buds, glossy leaves, fine patterns, and details of inflorescences.
Brush work No. 4
The size 4 sable brush is great for painting small plants. A small petal can be depicted with one or two strokes. The brush holds and releases the optimal amount of paint, and long, thin stripes can be painted on the stem without refilling the paint.

8. When the sun was a blot

This notebook contains several exercises for working with watercolors. They are suitable for warming up and will teach you to feel color and shape. This is not just a coloring book or a book about lines! She encourages you to think creatively, draw freely, and find your own style in art.
Exercise
Prepare purple, blue and green watercolors. Do these simple 4 exercises for fantasy and liberation. Feel the freedom of movement, lightness of strokes and joy from the process.

9. Artbook. Your life in words and pictures

Your art book is a place where you can freely improvise, improve your drawing skills, and capture important ideas and events in your life in a creative way. This bright book will give you inspiration and all the necessary tools to create your own sketchbook and draw for fun.
Brush with reservoir
It doesn’t matter where you are: the world gives us reasons to experience surprise and respect at every step. All this is worthy of being included in an art book. Brushes with a reservoir are very helpful when it is not possible to lay out all the necessary watercolor supplies around - in a cafe, on an airplane, in nature.

The book contains a lot of tips that will help you start creating, record memories in an art book, and develop your talents on its pages.
For more than 75 years, Walter Foster Publishing has been publishing teaching aids on drawing and painting for millions of amateur artists who, with their help, have learned to work in a variety of painting and graphic techniques. The nature of the presentation of material in our manuals is presented in such a fascinating and accessible form that even those who have never touched a brush or pencil before have discovered the talent of an artist. This is the guide to watercolor painting for beginners presented here.
A little history.
Walter Foster Publishing was founded in the 1920s by the efforts of one man. Walter Foster, a renowned artist, educator, and collector, began publishing art manuals from his home in Laguna Beach, California. He wrote them himself, illustrated them, printed them, bound them, packaged them, and handled their delivery and distribution. In the 1960s, as his work grew, he commercialized the production, which allowed him to expand the company and enter the global market. Walter Foster left us in 1981 at the age of 90, but he is remembered as a kind and dedicated man, the author of unique educational books.
About our products.
At Walter Foster Publishing, we strive to maintain the traditions of our publishing house by producing only high-quality products. We know that artists tend to strive to improve their craft and open new creative horizons. Because new artists often don't know where to start, we offer step-by-step drawing and painting tutorials that are accessible, fun, and affordable.
Perhaps today you opened one of our manuals for the first time, or perhaps you are already familiar with our products. In any case, we are confident that the book-guide on watercolor painting will not only help you master this difficult technique, but will also give you pleasure. And whatever your creative ambitions, we wish you good luck and hope that you always enjoy the creative process!
Caroline Linscott has been interested in colors and painting for as long as she can remember. As a professional watercolor artist, Caroline says: "I'm happy because I'm doing what I love and doing it to the best of my ability. I feel like I'm going up an escalator with no end in sight to my journey through the world. art."
Although Caroline studied painting as a second subject in college, she began studying watercolors about 10 years ago. A longtime fan of artistic watercolors, Caroline began taking lessons in Sedona, Arizona, and soon could not tear herself away from this type of painting.
She currently lives in Southern California where she teaches watercolor painting to children and adults. Caroline is active in local arts councils and the State Artists Association. She served as President of the Society of Women Artists of the American West for three years, ending her tenure in November 1998. She is also the author of The Fine Art of the American West (1999).
Watercolor painting for beginners with a tutorial

The unique properties of watercolor paints make them a fascinating and unpredictable artistic medium. Due to the fact that they are diluted with water, they become transparent and often produce unexpected effects. Now you can have fun and experience the joy that watercolor brings. Once you understand how to paint with watercolors (and harness their properties), you'll be amazed at how easy it is to create beautiful paintings. On the pages of this self-teaching book on watercolor painting, I will introduce you to some of the basics of watercolor painting and some professional techniques using examples of different subjects. I hope these examples inspire you to pick up a brush and start painting. After reading this book, you will be ready to move on to the next step using Geri Medway's book, Watercolor Step by Step, as a guide. Ita, are you ready? Then let's get to work!
Readers are offered a modern tutorial, which is a unique collection of artistic techniques for working with watercolors.
This book is invaluable for those who have just begun to get acquainted with such an interesting technique as watercolor, and interesting for those who have already started working with it. Ready-made techniques will allow beginning artists to develop both creatively and technically, saving time and effort for further professional growth.
Effective, visual and modern teaching methods are aimed at unlocking natural potential and providing an opportunity to master simple and accessible artistic skills.
PAPER.
For watercolor work, paper is one of the most important materials. From quality, type, density relief, etc. It depends on how the watercolor drawing turns out.
Modern paper is made from both wood and textile fibers. The latter is significantly more expensive. Sizing also affects the cost of paper. Thanks to sizing, paper can withstand frequent and abundant wetting without warping. Particularly high-quality paper is supplied by the manufacturer with raised markings or watermarks. Watercolor paper comes in three grain sizes: fine, medium and coarse.
On fine-grained paper, colors look brightest, and they also dry the fastest. The strongly pronounced relief of coarse-grained paper allows it to be used in artistic techniques; in addition, it holds water very well. Medium grain paper is a compromise.
The thickness of the paper is what you should pay attention to first when purchasing. The density of any paper, including watercolor paper, is measured in the ratio of mass (grams) to area (square meter). The more grams per square meter, the denser the paper. The thickest paper is considered to be 250 g/m - 300 g/m and more. The denser and thicker it is, the better.
In countries where a non-metric system of measures is traditionally used, their respective units are used.
CONTENT
Materials, equipment, artistic techniques 5
Materials and equipment 6
Tools for working with watercolors 6
Materials 10
Getting Started 13
Artistic techniques 14
Transparent and translucent paints 14
Thick and thin paint 16
According to Sukhon, or uniform coloring 18
Using pencils 20
Fill 23
Thin pines 27
Wet or wet 30
Multilayer painting, or dry on dry
Softening dry edges, or shading 38
Softening of boundaries on wet 40
Strokes 42
Dry brush 46
Stamps 49
Reserve liquid, tape and stencils 51
Scratch and eraser, or open white on dry 55
Washing down to base, or opening white on wet 56
Palette knife 58
Salt 60
Squirting 62
Paper relief 63
Let's draw together 67
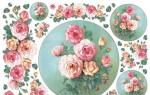
We depict roses using different artistic techniques 69
Repetition of training 72
Using photography as an aid 74.
Download the e-book for free in a convenient format, watch and read:
Download the book Self-instruction manual on painting with watercolors, Shmatova O.V., 2010 - fileskachat.com, fast and free download.
- Artistic work, 8th grade, Option for boys, Chukalin V.G., Yakovlev R.M., Tanbaev X.K., Ermilova E.V., Welker E.E., Losenko O.S., 2018
Marina Mylnikova
A wonderful and well-written book from the “Learning to Draw with Olga Shmatova” series for adults and children who want to learn how to draw correctly and beautifully. It clearly and in detail describes all the basic techniques for painting with watercolors. All material is presented in an accessible form. A child can deal with it independently, without the help of adults. The book contains many illustrations and visual examples. Looking at this wonderful publication, you immediately want to pick up a brush and start painting. The print quality is good. Thick offset paper, hardcover, color, detailed step-by-step instructions and descriptions. Even an adult who has never studied at an art school, but has a desire to simply draw, will find a lot of interesting and useful things in the book. I believe that this is a unique collection of all existing techniques for working with watercolors. Using this book, you can master a large number of these techniques and learn how to use them in practice, as well as discover more than 20 plots for creating wonderful paintings.
7 0
Tatyana Levina
Having started painting with paints with my two-year-old son, I became so interested that I wanted to learn how to paint truly beautifully, for which I purchased Olga Shmatova’s Self-Instruction Book. I am completely delighted with the book, because it very clearly, methodically and consistently explains to me, as a beginner, the basics of artistic watercolor painting: tools and materials are described in detail (in particular: what brushes are, how they differ and in what cases they are used; different types of paper and types of paints, etc.); a minimum set for beginners is provided, as well as specific instructions on where to start drawing. The author talks about how to better learn the properties of paints, and shares numerous artistic techniques using specific examples, and analyzes the most common mistakes of novice artists. The tutorial contains techniques for applying fills, softening the boundaries of dry and wet, using a dry brush, stamps, salt, stencils, skimming liquids, sprayed and others. I regularly study using this book and am pleased to note that my diligent scribbling as a beginner is gradually acquiring a decent artistic appearance. I am convinced that the title of the book fully reflects its content. This is exactly the Self-Teacher. I'm very pleased with the purchase.
7 0
Korchagina Anna
A very good manual that has a number of advantages compared to similar publications. This is, firstly, the simplicity and accessibility of the materials, tools and equipment recommended by the author. Secondly, a detailed description of the properties of watercolor paints, features of working with them, practical advice on testing paints and paper (after all, despite its apparent simplicity, the watercolor technique is quite complex). Thirdly, the book, in addition to step-by-step recommendations, provides examples of unsuccessful work with a detailed analysis of such results. It is better to start getting acquainted with watercolor techniques with this book. It will not be superfluous in the future thanks to many original artistic techniques. Everything is very simple, accessible, and interesting for both children and adults. Plus the good quality of the publication: dense offset pages, clear printing, color inserts on each page with technical information. Such a delicious book! Just its appearance makes you want to pick up a brush and paint.