We draw a pine tree step by step. How to draw trees with a pencil step by step - coniferous and deciduous. How to draw an oak tree with a pencil step by step
Spruce? It is very difficult to find a person who has never drawn this tree in his life. But if you don’t know how to do this, our article will teach you this simple task.
Spruce is a symbol of the holiday!
Spruce is something that everyone certainly associates with the holiday, the New Year! This evergreen coniferous beauty becomes a real green fairy for children, delighting them on the morning of January 1 with gifts hidden under the branches. Does your child ask you to draw a Christmas tree? Or maybe you need to make some kind of composition with it for children's party or a matinee in the garden?
We will be happy to provide you with several simple master classes that will teach you how to draw a spruce step by step.
Method number 1: from top to bottom
The first method, which we will consider in our article, will be based on drawing a tree from its top. Learn to draw such a spruce. And then it won’t be difficult for you to create an entire forest on a piece of paper!
So, how to draw a spruce, starting from its top? Everything is very simple!

Method number 2: from bottom to top
The first method of depicting a spruce is not bad, but, you see, it is much more convenient to draw from the bottom up, and not vice versa. This makes it much easier to adjust and plan the height of the tree.
How to draw a spruce from bottom to top? Now we'll show you!

Method number 3: as easy as shelling pears!
How to draw a spruce in the simplest and most unpretentious way? We know it and will definitely share it with you. Using this method, even a small child can draw a Christmas tree.

How to draw a spruce branch
But what if you don’t need the whole tree, but, for example, only one branch? Well, we'll tell you about that too. Arm yourself with a pencil and paper, let's get started!

The drawing is ready!
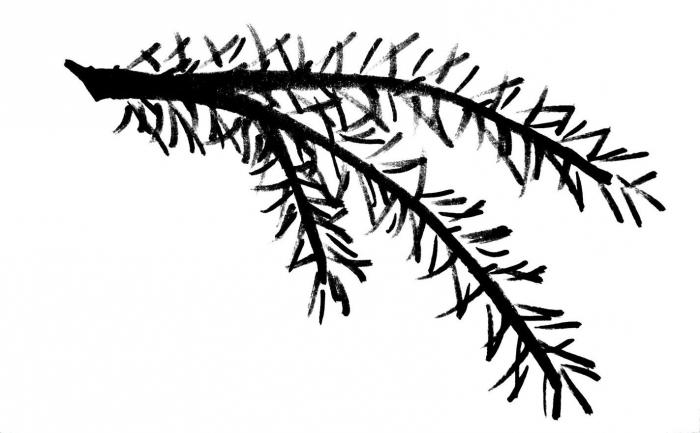
Now you know how to draw a spruce branch yourself. You can even teach this, for example, to your child.
Using the methods described above, you can draw a branch of a coniferous tree or the spruce itself with a pencil, felt-tip pens and even paints. The tool in this case does not matter much. Draw, create yourself and together with your children.
Master class for children 4-6 years old: “Drawing a pine tree using watercolor technique”
Author: Knis Anna Nikolaevna, senior teacher.
Place of work: MBDOU " Kindergarten No. 3 "Smile", Kalach-on-Don.
Description of work: I offer you a master class: “Drawing a pine tree using watercolor technique for preschoolers. The material may be useful for educators and teachers additional education, teachers, children and their parents.
Purpose: The drawing will serve as a wonderful gift and can be used for interior decoration.
Target: Drawing a pine tree using watercolor technique.
Tasks: Develop creative thinking and imagination;
Teach children to draw a pine tree, accurately conveying the structure of the trunk and branches; Continue to strengthen children’s skills in drawing with a dry brush and poking;
Cultivate accuracy during work;
Improve skills and techniques for working with watercolors.
Pine.

Pine is loved in Russia no less than birch. Stately, stern, she stands against all the winds. Pines are always not far from us. If there is no pine tree in the nearest forest park, then you just have to drive a little away from the city, and there it is, a stately beauty. It stands, stretches its branches and thin needles towards the sun, and gently sways in the wake of the wind.
Pine is considered a true “tree of life”, which always looks green and fresh even at a very advanced age. It is highly valued as a symbol of long life and lasting marital happiness. Particular attention is paid to pine as a symbol of inviolability and resilience in Chinese art, because even in cold winter she keeps her needles, and the fact that they always appear in pairs means life together, as is the case in marriage.
Pine is the oldest healer. Its healing needles were included in medicinal compositions five thousand years ago. Pine extract for baths is obtained from pine needles, essential oil, ointments for the treatment of burns.
Pine is a very valuable forest species. Produces industrial ornamental wood. Pine wood is permeated with resin passages, as if impregnated with resin, which protects the tree from rotting. It is used to obtain resin, from which turpentine and rosin are obtained. Cellulose is obtained from fresh ridges.
Pine forests are magnificent at any time of the year. Mighty trees with crowns rising high above the ground, with slender trunks covered with reddish bark, attract you under their canopy. The beauty of pine trees is a source of inspiration for many artists, poets and writers.
Materials and tools:
- watercolor paints;
- brushes No. 12, No. 2, squirrel;
- drawing paper A-4;
- a simple pencil, eraser;
- watercolor paints;
- palette, sippy cup.

Stages of work:
Using a simple pencil on a vertical sheet of paper, draw a pine trunk. The trunk of the pine tree is tall and straight.

Next, draw branches from the trunk up and slightly to the sides.

Around the branches we outline the silhouette of the tree crown, in the form of clouds. We will leave the lower branch without a crown - a dried twig.

Add a horizon line.

Using a wide brush, paint the sky with blue watercolors.

We paint the ground with light green watercolors, and the crown of the pine tree with emerald.

Paint the trunk with brown watercolor.

Use dark green watercolors to paint the grass on foreground and crown edges.
Instructions
Start with the trunk that pine trees grow in the forest or on open space, straight and quite thin. Draw in the middle album sheet a very narrow and long rectangle, tapering at the top. In a field pine, the trunk can bifurcate in the first quarter from the ground.
Start drawing the branches growing from the pine tree almost perpendicular to the trunk. However, you should not depict branches with straight lines - it looks unnatural. Draw broken lines, whimsically curved lines and do not forget to divide a large branch into several small ones as it moves away from the trunk. Remember that a pine tree grown in the forest is very different from a field pine - the latter has a dense crown starting one and a half to two meters from the ground, while a forest pine most of the trunk is devoid of branches.
Place branches not only on the sides of the trunk, but also on the back and front. The branches located directly in front of the trunk will appear the shortest and at the same time the densest, and the branches behind can not be drawn in detail, limiting yourself to shading with a pencil. Also note that the pine branches become shorter and thinner as they approach the top of the tree.
Draw the pine needles. Using confident pencil strokes, go over the ends of the branches, making the tree “fluffy.” Branches that are far from the viewer do not need to be drawn in too much detail - the needles can simply be indicated by shading. An old tree may have lower branches that are dry and bare or broken.
Add shadows. Try to place them correctly in one direction, focusing on an imaginary light source. By using deeper shading on the sides of the trunk, you can show its cylindrical shape. Shadows from the branches will add expressiveness to the picture.
Video on the topic
Celebrate individual characteristics trees: broken branch, hollow, bird's nest. Such details will make your drawing more realistic and interesting.
Sources:
- how to draw a pine tree step by step
While creating cartoon drawings the artist is faced with the need to paint nature so that it looks both quite natural and at the same time does not stand out from the general plan. You can draw tree bark using Photoshop, even if you do not fully master all the tools.
You will need
- - Photoshop program;
- - photo of a tree.
Instructions
Create a new document in Photoshop. Select a standard round brush (size 40 px, opacity 40%) and paint the trunk, making many long strokes. At the same time, change the pressure on the pen to get a slight “striation”. If necessary, make branches; the strokes should extend slightly into the trunk.
On the side where the sun will be, make a few strokes with a lighter brush (of the same shade), and on the opposite side darken the trunk a little. At the very edge dark side You can draw the darkest strokes - use photographs of real trees as a guide.
Create a new layer for the fibers. Using an opaque round brush (size 8 px), paint the wood fibers in the form of a rhombic network. The color you need is the darkest one used previously. Select the optimal transparency using the Soft Light blending mode.
On the same layer, using a 4 px brush with 60% transparency, fill each cell of the network with fine shading. Try to ensure that the shading in adjacent fibers is consistent. different directions. You can add a few cracks between the fibers.
There is a wide variety of trees in nature, as well as a wide variety of animals or birds. All this huge variety is classified according to different criteria. But features are important for an artist appearance tree. And in order to learn how to draw it, you need to observe the shape of the trunk, the shape of the branches, leaves, and the shape of the entire crown of the tree. After all, each breed has its own characteristics. Therefore, we will discuss these features in 6 types of trees - maple, birch, pine, spruce, willow and oak (but I recommend reading first).
Maple.
- The maple trunk can bend and branch, which gives it a sinuous shape.
- Bark dark color, is generally similar to the bark of most trees.
- The top of the crown of this tree is rounded, but may also have an irregular shape.
- The maple leaf is known to have a pointed shape, similar to a star. Large masses maple leaves create a “spiky” texture of the crown surface.
- When shading the crown, you can also use longitudinal strokes, but to show the character of maple foliage, it is better to add a “clumsy” or “prickly” textured stroke to the drawing, similar to maple leaves (I wrote about the texture of shading). The same principle should be followed in painting, painting the canvas with strokes that would create the illusion of foliage. Considering that leaves and branches are combined into separate groups, the texture of shading and painterly strokes should be varied.
Birch

- Birch comes in different varieties. In the middle zone, the trunk of birches is usually straight and “slender”. In other areas, a birch trunk can form a “slingshot”, bifurcating at the root.
- The crown of a birch often has an elongated shape, directed upward. However, there are also birches with a spreading, squat crown.
- Birch bark is white on the surface. But it has dark “strokes”, which are essentially cracks through which the dark inner layer is visible. The closer to the ground, the more often these “strokes” appear on the bark. “Black lines” are present on the trunk at the base of the branches, i.e. in those places of the trunk from where the branches grow. They can have a triangular or rectilinear shape.
- Small birch branches are so thin and flexible that they hang down, rushing down. The leaves growing on these branches form vertically directed rows. The branches bending towards the ground bend, giving the appearance of birches a special awe and lightness.
- In pencil drawing or painting, the graceful character of birch trees can be conveyed by longitudinal vertical shading or appropriate strokes of paint. Pencil movements or brush movements can follow the movement of the branches described above.
Pine

- The pine trunk is straight. However, there are pine trees with a trunk that bends at the top and have a “stocky” character. Often there are ship pines in which the crown is located at the top of the tree, and the trunk is straight and tall.
- The bark of this tree has a red color, which, as it approaches the ground, becomes much darker, turning into gray-brown. In the middle of the trunk, the pine bark resembles a flaky, scaly structure. Closer to the ground it becomes coarser and forms a dense, cracking layer.
- The crown of young pines has a triangular, cone-shaped shape. But the crown of mature trees will already be more rounded.
- The branches of perennial old pine trees can be twisted and gnarled. As a rule, pine branches do not point very upward. To a greater extent they are directed to the sides of the trunk.
- Pine needles are longer than spruce needles. Therefore, they create the feeling of a fluffy crown, which needs to be displayed by graphic means, or painting techniques, if this is not a drawing, but a painting. It is necessary to use a textured stroke or appropriate strokes in painting. Each branch has light and shadow, so the artist needs to think about how to draw the volume of individual branches in the overall mass of the crown.

- Spruce and pine have much in common, but this different trees, with its own characteristics. For example, if the trunk of a spruce tree is as straight as that of a pine tree, then the nature of the branches will already differ from the nature of pine branches. The branches of the spruce are slightly curved upward. In the lower tiers, the old branches are lowered down and resemble “paws”.
- Spruce needles are shorter than pine needles, so the overall texture of the crown of this tree will differ from that of pine.
- The crown of the spruce tree is shaped like a triangle or a cone and consists of tiers.
- When an artist paints a landscape, he paints trees in volume. To do this, you need to monitor how the entire tree is illuminated and how individual branches or tiers of branches are illuminated. For example, going inside the crown, the spruce “paw” plunges into the shadow. From the outside, it can remain light because it receives more daylight.
- The color of spruce needles is dark and rich. Therefore, both individual spruce trees and the spruce forest as a whole will differ in color from other types of trees.

- Willow trees can look different depending on the variety. For example, at weeping willow the branches are more flexible and plastic than those of ordinary willow. Because of this, its branches hang down, rushing to the ground.
- Willow is characterized by constant branching of the trunk, as well as large branches.
- Willow leaves are narrow and oblong. This greatly affects the appearance of the tree. That's why this feature you need to be able to reflect it through shading or brushwork in painting.
- The color of willow foliage is complex. On one side of the leaf the color is green. And on the other - light, gray-green. Therefore, the overall color of the tree is distinguished by gray-blue shades.

- The oak trunk is powerful. In old trees it can reach a large diameter at the base. But in dry areas, oaks can be less stocky, looking like slender young oaks.
- The branches and trunk of the oak tree are twisted and gnarled.
- The shape of the leaves is wavy. That's why general form the foliage as a whole will be “gnarled and curly.”
- The bark is rough and dense.
- The foliage color is dark green, rich.
Here I looked at the appearance features of only six varieties of trees. In nature there are a huge variety of trees and other plants. How can you learn to draw, if not all of them, then at least a couple of dozen varieties? To do this you need to develop observation skills. If an artist has a good eye and good powers of observation, then it doesn’t matter what he draws. The main thing is to understand nature and notice key points. And what points you need to pay attention to are discussed in educational material. For those who want to learn how to draw landscapes with trees well, it will also be useful to study the diagrams and technique called (I mentioned it at the beginning of this article).
Already drawn +21 I want to draw +21 Thank you + 70
Step 1.
So, as usual, first looking at the subject in the photo, we try to depict the basic shape of the pine tree and its branches with thin lines of an HB pencil. Immediately sketch out the branches that you most want to show. It is absolutely not necessary to draw exactly the branches that I drew, because... you should develop your own vision of the drawing, and not copy mine. Moreover, you don’t need to draw all the branches by copying a photo. We draw only what you, as an artist, want to show the viewer. For now, we draw only the basic shapes and the location of the branches.
Step 2.
At the second stage, we slightly increase the pressure of the pencil and go along the trunk and each branch, more clearly defining the details and outline of the drawing. We draw small branches, broken twigs, and show the connections of the branches with the pine trunk. As a result, we get a clean outline of the object in a simple pencil. Such a drawing is called linear or, as they say in some literature, linear, i.e. drawn with lines.
Step 3.
The next stage is adding tonal spots that determine the light and shade of the object. Using the same HB pencil, we shade through the dark areas of the pine bark, showing the shadows of the branches. We also shade the area around the pine trunk, showing the depth of space, which will give the drawing some expressiveness. Next, we go through the area around the tree trunk with a feather, softening and smoothing out the pencil strokes so that the background looks more like spots rather than strokes. You can also lightly brush along the shadows of the tree branches. This drawing was made in mixed media, because lines, strokes, and spots were applied.